
Subject isolation photography is a great way to learn about the fundamentals of composition, and can help you develop the skills necessary for capturing beautiful images. There are several techniques you can use to achieve this effect, such as using specialized lenses, camera settings, and accessories. Here are some tips to get started: Make sure you know the subject, and make sure you're shooting in a neutral environment.
Long focal lengths
Your photography will be more successful if you choose a long focal length. This will help you separate your subject from its surroundings. You can zoom in further and remove distracting elements if your focal length is longer. Long focal lengths also compress the background, giving your subject a simple and clean frame. 100mm is the ideal focal length to isolate photography.
A telephoto lens will give you better results, although you will need to reduce depth of field, focal length and focal length. You will also need to pick the right lens for the scene that you want to capture.
Contrast
Contrast is an important element in isolation photography. You can isolate your subject by using contrast. This will make it stand out from all the background. You can also blur the background by using a wide aperture. This method will result in a shallow depth of field and a focus on the subject.
Contrast makes your subject stand out and gives it more interest. This is particularly useful for portrait photography, in which the viewer should focus on the subject and not its surroundings. Portraits should be focused on the subject. Increasing the size of the subject will help the viewer focus more attention on it.
Back and side lighting
When photographing an object in isolation, using side and back lighting can enhance the image. It can also create different moods. This technique is especially effective for photographing shiny surfaces. It helps to determine the object's size and shape by removing reflections from shiny surfaces. This type of lighting may not be as common as top- and bottom lighting, but there are several benefits.
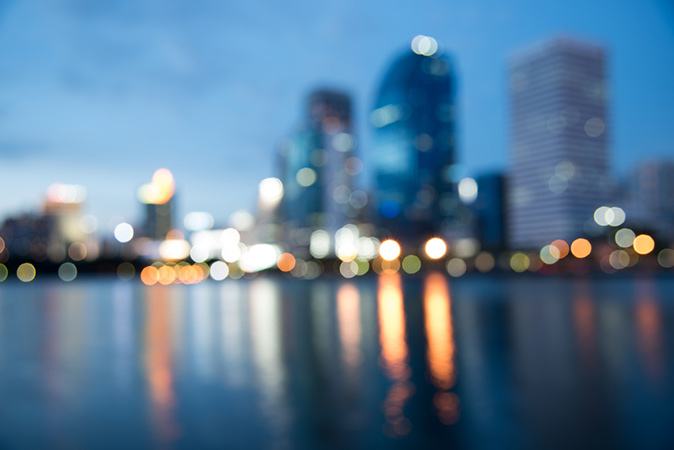
Side light is used to draw attention to the subject, separating it from the background. The boys are lit in this example against their backs and sides, and the background woodland is blurred and in shadow. But, the viewer's attention is drawn towards the subjects because of a crack in the tree canopy.
The field is only shallow
A small aperture is one of your best options to achieve shallow depth-of-field in your photography. This will allow more light to enter the photo and put the subject in focus. Shallow depth of field also creates blurred backgrounds. A fast shutter speed can create shallow depth of fields. It is essential to learn how to use your DSLR camera’s settings to create the desired effect.
This is the easiest way for you to isolate your subject. This will simplify your background and foreground by decreasing their importance. It can create beautiful blurring effects around your subject. To soften the background, and to deemphasize your foreground, you can use a large aperture. This minimalistic scene will draw attention to your subject.
Pattern recognition
One of the most important aspects of isolation photography is pattern recognition. It allows the photographer to isolate a subject by minimizing background and foreground elements. This technique has many applications including image processing, speech recognition, and speech recognition. It can also accurately identify faces in photos. This is a crucial function for security systems.
Pattern recognition is about identifying similarities between two items or groups. It involves constant comparisons and identifying patterns. It is possible to spot patterns in large amounts of data. Pattern recognition must counter the effects homeostasis (entropy) and entropy, which can lead environmental devastation.
FAQ
Is digital photography hard?
Digital photography isn’t as easy as you may think. Learning how to properly use the tools takes effort and time. It is important to be familiar with the settings that are best for each type of shot. The best way to learn is by doing. Practice makes perfect.
How can I improve the quality of my photos on my phone
Photography doesn't have to be expensive. With just a smartphone, you can capture amazing images.
All you need to do is to be able to use the features of the program and to master some basic techniques.
There are many apps available for both Android and iOS devices that make it easy to edit and share your pictures.
Here are five tips to help get you started taking better photos.
-
Set Up Your Camera App. Your device should already have your camera app installed. If not, download it from Google Play or Apple's App Store.
-
Use filters and effects. You can change the look of your photo with filters and effects without even touching it.
-
Adjust Exposure. Adjusting the exposure can help you control the brightness in your picture.
-
Use the Right Lighting The brighter the light, the easier it is to see details. Photographing in low light conditions allows you to capture the highlights and shadows of your image.
-
Take Pictures Of People. Photographing people can show others what you are most passionate about.
Check out this article to learn how to take better pictures with your smartphone: 5 Tips To Improve Photography Skills
Is photography an artistic talent?
Photography is not a skill, but an art form. This requires years of practice, training, and experiences. To master any aspect of photography, it takes years of practice and study.
You need to plan how you will make money in photography.
To do this, you need to understand what kind of clients you want to attract and find ways to reach them.
You need to know who they are and what they want. To convince them to purchase your services, you need to be able to communicate clearly.
This means that you will need to be well-organized and prepared when you meet potential clients.
A portfolio of your work is essential in order to be able to approach potential clients. You can do this digitally or on paper.
Once you have created your portfolio, you need to find opportunities to display it. This could be by approaching businesses directly, or even advertising online.
How can I learn photography by myself?
If you want to learn how to take great photos, there are many ways to do this. You could buy a book, attend a class, join an online community, watch YouTube tutorials, etc. You can't go wrong with doing it yourself if you are serious about mastering the art of photographing. So you can decide what goes into each picture. You will continue to learn and improve, so long as you are willing to keep learning.
One of the best aspects about digital photography is that it doesn't require any expensive equipment. All you need is an internet connected computer and a camera. All the rest is up to your imagination.
Here are some tips to get you started.
-
Acquaint yourself with the manual settings of your camera.
-
Learn how the basic controls work.
-
Take lots of photos.
-
You can edit them.
-
Share them.
-
Keep practicing.
-
Experiment.
-
Consider different angles and perspectives.
-
Use light sources creatively.
-
Practice makes perfect.
-
Be willing to fail.
-
Be patient.
-
Have fun
Light Room can enhance your photos.
Start early to get the best photos possible for your project. It's always a good idea to take as many pictures as possible and then decide which ones will be the most valuable.
Lightroom makes it easy to do this. It lets you see how different settings impact each photo. These settings can also be modified on-the-fly in Lightroom without ever having to open Photoshop again. This allows you to quickly experiment with what looks good and what doesn’t.
Statistics
- While I cannot prove that all of those spots were not sensor dust, the photo was taken during a heavy snowstorm…so I guess that 99.8% of the spots are snowflakes. (bhphotovideo.com)
- There are people out there who will pick at flaws they can only see in 100% crops of your photos. (wikihow.com)
- That's the easiest way to get blurry photos 100% of the time. (photographylife.com)
- The second easiest way to get blurry photos 100% of the time is to use a cheap filter on the front of your lens. (photographylife.com)
External Links
How To
How to take macro shots in photography
Macro photography can be defined as the ability of taking pictures at close range of small objects, such insects or flowers. Macro means large in Greek. A lens with a focal length over 50mm can be used to take photos of objects very close up.
A good macro lens must have a long work distance and a fast aperture so that sharp images can be captured without having to move around. Also, avoid moving while taking photos as it could blur your image.
Here are some great tips to create stunning macro photographs.
-
Use a tripod. Set up a table or chair so you don’t knock anything over. This will ensure that you have less movement while shooting.
-
Pick the right lighting. Macro lenses usually come with built in light filters. But if you don’t, you can always buy one. This helps prevent overexposure.
-
Be patient! Shooting macros takes practice. Sometimes, you may only be able to see a small bug or flower. But it's worth the effort to keep taking pictures until you get it.
-
RAW file format allows you to shoot in it. RAW files can store more information than standard JPEGs. RAW files can be edited later and allow for more detail such as cropping and color correction.
-
Remember to include the background. Sometimes the background can add interest to your shot, even if you have a great foreground object. Try to include it in your photo.
-
Keep learning.