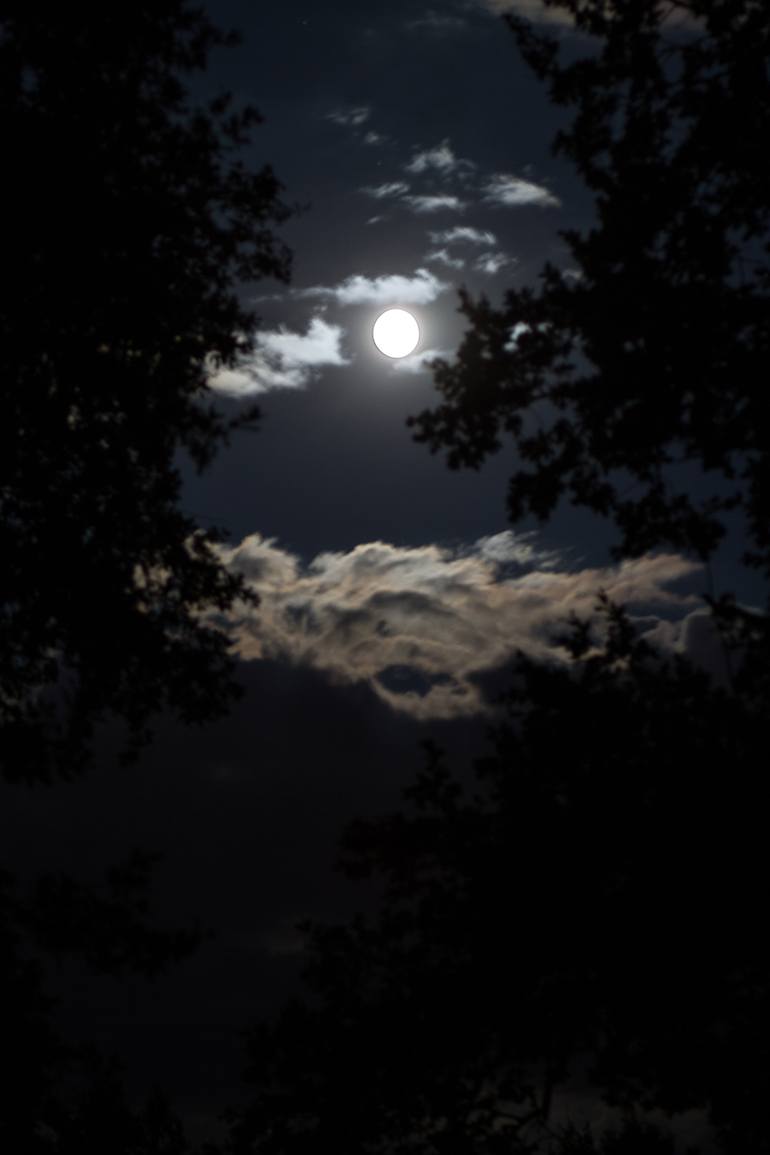
The sky can be an amazing subject for photography. Photographing the sky at sunrise and sunset is a great way of capturing the amazing colors. You can also give your photos a different look by taking pictures at sunrise or sunset. It is also a good idea for photos to be taken during the golden hours, which is a short time before or after sunset.
YouCam Perfect
The YouCam Perfect app is essential for anyone who has ever taken a photo and wants to improve it. The app's many photo editing tools and highly realistic filters will create amazing visual effects. The app lets you edit your photos by selecting different backgrounds, adding frames, stickers, and animations, and applying various effects. You can also replace the sky in your photos with the app's sky replacement tool.
YouCam Perfect has a powerful beautification feature that allows users to add and remove beauty effects to their photos. It features an intuitive user interface as well as advanced augmented and artificial intelligence technologies that give your images a unique appearance. You can also access Beauty Circle, a social network for fashion enthusiasts that allows you to share photos and find the latest fashion trends.
BeFunky
BeFunky has a Replace Color tool that allows you to change the color sky in a photo. You have two options when using the Replace Color tool. The Target Color is the color you want to change and the Source Color is the original image. The Source Color is your original image's color. The Target Color is the one you want to change. The latter will allow you to replace the sky overexposed in your image with the desired color.
BeFunky allows you to alter the color of any image with a free editing tool. You can also delete backgrounds from portraits. It offers a variety of vector graphics and stock pictures to choose from. It works in your browser. You can also use it on mobile devices. It's free to download and you can use it.
BeFunky's Color Replace tool
BeFunky's Replace Color Tool allows you to change your sky photo's color. It comes with two options: Source Color and Target Color. You can first choose the Source Color, then select the color you want to replace. You can also alter the sky color by moving the Tolerance slider.
The Replace Color tool lets you replace any part of the image with another color. It can be used to match any colour palette and create completely new pictures. The Replace Color tool is also very useful in creating unlimited wardrobe. You can adjust the colors and styles of clothes. It produces realistic results.
YouCam Perfect's Change Background program
YouCam Perfect's change background tool is great for changing the sky photo you have been using. This app has 30 sky replacement options. It makes it super easy to change the sky on your photos. Just a few taps and you can change your preferred sky color. You can also zoom out and adjust sliders so that your sky is perfect.
There are fun animations that can be used to enhance your photos. You can, for example, add a little sparkle to your photo or make it more summery. The app allows you to export your animated GIFs, videos, and perfect shapes for Instagram. The premium version allows unlimited editing of up to two photos per day.
FAQ
What makes an excellent camera bag?
A camera bag protects your gear and is essential when traveling. These are some important things to keep in mind as you choose a bag.
-
You should choose a large bag that can hold your accessories and camera comfortably. Don't go bigger than you think you will need.
-
Durability: You should look for bags made from durable materials, such as canvas, nylon, leather, and polyester. Avoid plastic and fabric bags.
-
Protection: Make sure your bag provides protection against dust, dirt, moisture, and scratches.
-
Organization: To make it easier to find what you need, organize your gear according to type. So, you can place your lenses in one box, your memory cards in another and your battery charger in a third.
-
Comfort: Use a shoulder strap to carry your camera instead of a bag. Comfortable designs with padded shoulders are also recommended.
-
Price: Check around to find the best prices. You may find some brands that sell their products at a discount price, which is a great bonus.
-
Warranty: Find out whether the company offers a warranty. This will allow you to know who to contact if your bag becomes damaged.
Should I take up photography as a hobby or a profession?
Photography is a wonderful way to share memories with family and friends. It allows you to discover more about the world.
There are many resources online that will help you take better photos if you're interested in this topic.
Consider enrolling at local art schools or community colleges. You can meet other photographers and get valuable feedback about your work.
Where can I buy cameras?
You can find many places online to buy cameras. B&H Photo Video is a reliable retailer. They have knowledgeable staff that can help answer any questions you may have.
B&H ships quickly and securely to make it easy for you to get your order to your door.
If you want to learn more about shopping for cameras, check out this video.
How do you get started in digital photography
If you are just starting to get into digital photography, the most important thing is to choose which camera you would like. There are many choices: DSLRs (digital single lens reflex camera), point-and shoot compact cameras and camcorders. Each camera has different benefits and features. DSLR cameras are more expensive and weigh more than other types of cameras. Point-and–shoot cameras can be smaller and lighter than DSLR cameras, and they often have automatic settings that allow for special situations. Camcorders provide excellent video recording capabilities and may also feature still photo shooting modes. Smartphones are small, light, and easy to carry around and offer great image quality and many advanced features such as GPS mapping, music playback, and Internet browsing.
Once you've chosen the type of camera that you want, you can decide whether to purchase a used or new model. If the camera was purchased in the past few years, it is possible to find used cameras at reasonable prices. Newer models cost more, as manufacturers spend a lot of money on developing new technology.
Next, you need to purchase lenses. Lenses are a critical part of determining the quality your photos. You can adjust the focal length of the lens to allow you to zoom in on the scene without losing focus. Some lenses can be equipped with flash units that are built-in, while others may require external flash units. A wide range of lenses is available from various brands, each offering unique characteristics.
Finally, you need to purchase memory cards. Memory cards save pictures taken with your camera. You can store hundreds, thousands, or even more pictures depending on the size of the card. Multiple memory cards will be required if your plan is to take lots of pictures.
Do I Need A Tripod?
This is a question everyone asks. The truth is that a tripod isn't always necessary, but it can come in handy.
It helps you keep your camera steady while taking pictures at slow shutter speeds. If you're shooting landscapes or other stationary subjects, then a tripod can make a big difference.
However, a tripod can blurriness if you are photographing moving subjects, such as people or athletes. What are the best ways to determine which situations you need a tripod for?
A tripod can be useful in any situation where you need to capture fast action or stationary subjects. Examples include:
-
Sports
-
People
-
Landscapes
-
Close-ups
-
Macro shots
Try this test to find out if you really need a tripod. Hold your camera still and look through the viewfinder. If blurred lines appear or you feel movement, you will definitely need a tripod.
If there isn't blurring you won't notice any benefit from adding a tripod.
If you do decide on a tripod purchase, these are some things to remember.
-
Smooth legs are important for tripods. This will prevent unwanted vibrations from shaking your lens.
-
Use a sturdy tripod. Some tripods may be made from plastic, which can make them less durable. Opt for a sturdy metal tripod.
-
A remote release is a great option. This allows you to control your camera remotely. You can set it to fire the shutter once you press the button automatically.
-
Try to find a tripod with a head that rotates 360 degrees. This makes it easier for you to position your camera horizontally, or vertically.
-
Keep in mind that tripods aren't cheap. Expect to spend between $100 and $200. However, you'll get lots of value for your dollar.
-
Accessories like memory cards and filters should not be forgotten.
-
Before you buy online, make sure to check your local shops. Many retailers offer free shipping.
-
Read reviews to determine what customers think about a particular product.
-
Ask family and friends who have similar products.
-
You can learn from customers' experiences by visiting message boards and forums.
-
You can search online for reviews from other users.
-
Amazon.com allows you to compare prices, and receive customer feedback.
-
Take a look at these photo galleries to see what other photographers do with tripods.
Statistics
- The second easiest way to get blurry photos 100% of the time is to use a cheap filter on the front of your lens. (photographylife.com)
- While I cannot prove that all of those spots were not sensor dust, the photo was taken during a heavy snowstorm…so I guess that 99.8% of the spots are snowflakes. (bhphotovideo.com)
- There are people out there who will pick at flaws they can only see in 100% crops of your photos. (wikihow.com)
- Get 40% off Adobe Creative Cloud(opens in new tab) (creativebloq.com)
External Links
How To
How to take macro photos in photography
Macro photography is the ability to capture small objects, such as insects and flowers, at close range. Macro means large in Greek. When you use a lens with a focal length greater than 50mm, you can take pictures of things that are very close up.
A good macro lens must have a long work distance and a fast aperture so that sharp images can be captured without having to move around. It is important to avoid motion while taking photos. Anything that moves during exposure may blur your image.
Here are some tips for taking great macro photographs:
-
Use a tripod. You can use a tripod if you don't own one. This will make it less likely that you are moving when shooting.
-
Select the right lighting. Macro lenses usually come with built in light filters. But if you don’t, you can always buy one. This helps prevent overexposure.
-
Be patient! Shooting macros takes practice. Sometimes you might only be able see a very small insect or flower. However, it's worthwhile to keep shooting until it appears.
-
RAW file format allows you to shoot in it. RAW files store more data than standard JPEGs. RAW files are best for editing later because you can make adjustments like cropping and color correction after the fact.
-
It's important to remember the background. The background can sometimes add interest to your shot even though it is a foreground item. It's worth including it in your photograph.
-
Keep learning.