Horizontal lines in photography are powerful patterns that can add depth to any scene. They are especially useful when photographing clouds or a beach scene. You can also create a unique rhythm with them. There are many options for using horizontal lines in your photography. These are just a few examples of horizontal lines you can use in your photography.
Converging lines
Converging lines are common when you take photos of landscapes and drawings. These lines are designed to draw attention to the main subject. While it can be tempting to focus on just one element of the photograph, this approach can work against the purpose of highlighting the main subject. Consider using several types of diagonal lines instead to grab the attention of the viewer.
Diagonal lines
Look for diagonal lines that naturally occur in a photograph and incorporate them into your composition. This technique, also known as "the Dutch angle", is popular in cinematography. You can add drama to a scene with an off-center perspective. But make sure you don't create a diagonal that splits your frame in half.
Oblique lines
Oblique lines are a great way for your photos to have visual interest. They can be used to better frame the subject. For example, a fence post or leaning tree can add visual interest for a photograph otherwise uninteresting.
Level horizon
A key aspect of composition in photography is the level horizon. It is the line which separates the earth's top from the sky. The horizon in a scene could be anywhere, from a grassy area to the tops of a mountain. It can be as simple as a line running between a desk a a wall. The horizon can be described as any straight line through the frame.
Reflections
Photography reflections of horizontal line photography is very easy to capture and not as difficult as people believe. The key is to find the perfect angle and composition. A tripod will allow you to get the perfect exposure and reduce vibrations. In addition, you will want to raise the mirror before taking the shot. This will ensure that the reflection will appear clear and not blurry. Remember that composition is all. However, you don't always have to use the same composition rules for reflection photography.

Stair-stepped effect
Horizontal lines photography creates the illusion of stair-stepping. This optical illusion is caused by placing a staircase in a horizontally aligned photograph. The stair is a set of steps that rise and fall. The difference in height between the steps and their horizontal lines is 1 cm. It is created using a technique called digitising wand.
FAQ
How do I look beautiful in photographs?
The best way to ensure you look good in photos is to take them yourself. You'll learn how you pose for the camera and which angles are best. Additionally, you'll learn how to use lighting and props in order to enhance your natural beauty.
This course will teach you how to choose clothing that fits well, make-up that looks great, and hairstyles that flatter your face shape.
And if you're not happy with the results, we'll show you how to retouch your images using Photoshop and other editing software.
Don't be afraid to take some self-portraits.
What is rule of thirds for photography?
The rule of Thirds allows you to create unique compositions with minimal camera settings. It divides your image into nine equal parts, horizontally and vertically. It creates three main areas, where your subject should appear. These are the top (upper left corner), middle (center) and bottom (lower right). These areas can be used to position your subject within your frame.
The rule to thirds allows you to avoid placing important elements too closely together or too far apart. You might not have enough space between them for a strong visual impact if you put them close together. You might find that they lose focus if you place them too close together.
Which camera is best for beginners?
Your budget, your needs, and your skill level will determine which camera is best for beginners.
For example, if you're looking to save money, you might choose a point-and-shoot digital camera. These cameras can be very versatile, but they offer excellent quality.
Digital Single Lens Reflex (DSLR) cameras have interchangeable lenses that allow you to shoot various types of shots. These lenses are usually more expensive than point-and shoots, but offer greater flexibility.
A beginner's kit for beginners is a good place to start. Everything you need, including a flash, tripod, memory card and camera body, will be included in the one-pack.
Also, don't forget about extra batteries!
What can I do to improve my photography skills with my phone?
You don't need expensive equipment to take great photos! Amazing images are possible with just a smartphone.
It's easy to get started with the software.
There are many apps available for both Android and iOS devices that make it easy to edit and share your pictures.
Here are five tips to help get you started taking better photos.
-
Set Up Your Camera App. Your camera application should be already installed on your device. Download it from Google Play, Apple's App Store or Google Play.
-
Use Effects & Filters. You can change the look of your photo with filters and effects without even touching it.
-
Adjust Exposure. Adjusting exposure helps you control the brightness of your picture.
-
Shoot In The Right Light. Shooting in bright light makes it easier to see details in your subject. You can capture highlights and shadows in low-light conditions.
-
Take Pictures Of People. Photographing people can show others what you are most passionate about.
You can learn more about how to capture better photos by checking out our article, 5 Tips To Improve Your Photography Skills on a Smartphone
How do I become an excellent photographer?
Photography is an art form that requires practice, patience, dedication, and above all else, passion. Photography is a passion. You will be able to do much more than if your goal was to make a buck.
It is important to know how to properly use your camera. You must understand composition, lighting, exposure, depth of field, etc. Also, you will need to be able to use Photoshop.
Photography can be difficult but once you get the hang of it, it's a rewarding art form that allows you to capture moments in time that otherwise would have gone unremembered forever.
To improve your skills, you can read books and attend classes. You can also participate in competitions. You will gain confidence and experience, which can lead to improvements. What equipment will I need?
It all depends on what type photography you do. If you're interested in landscape photography, for example, you'll need a wide-angle lens.
A telephoto lens is essential for portrait photography.
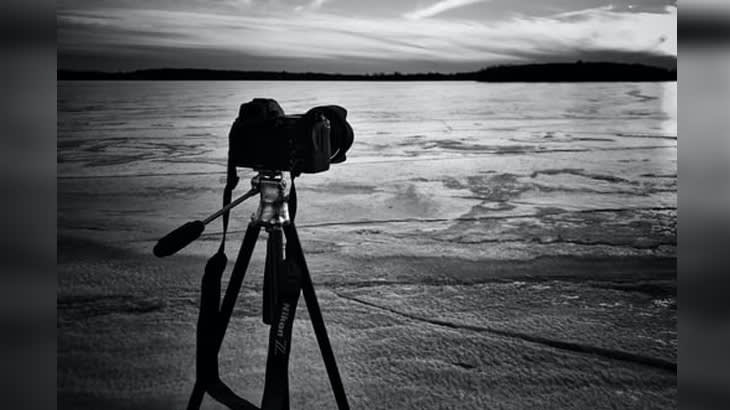
A tripod is essential when taking photographs. It allows you stand up and compose your photo without moving.
A camera bag can be used to carry your camera, memory cards, or other accessories.
If you use a compact camera, a flash unit is required.
A DSLR (Digital Single Lens Reflex) camera is by far the best choice for beginners who want to take professional quality photos.
DSLRs are great because they let you control every aspect in your photo including shutter speed (aperture, ISO sensitivity), white balance, focus and white balance. A variety of features are available such as autofocus and auto-exposure locks, bracketing, self-timer, and RAW formatting.
Where to Buy Cameras?
There are many online places where you can purchase cameras. However, we recommend buying from a reputable retailer like B&H Photo Video. They have knowledgeable staff that can help answer any questions you may have.
B&H ships quickly and securely to make it easy for you to get your order to your door.
Check out this video to learn more about purchasing cameras.
Statistics
- Get 40% off Adobe Creative Cloud(opens in new tab) (creativebloq.com)
- By March 2014, about 3 million were purchased monthly, about 30 percent of the peak sales total. (en.wikipedia.org)
- This article received 13 testimonials, and 100% of readers who voted found it helpful, earning it our reader-approved status. (wikihow.com)
- That's the easiest way to get blurry photos 100% of the time. (photographylife.com)
External Links
How To
How to take pictures in low lighting conditions
Low-light photography means taking photos in dimly lit areas. This requires special equipment and techniques. The main challenges include controlling exposure, white balance, and sharpness. Two types of low-light photography exist: ambient or flash. Flash photography works well when there is sufficient light around you. A flash is required if there isn’t enough light. A flash might be necessary if you are photographing a subject indoors and outside. If you don't want to use a flash, try shooting at night during the moonlit hours. This will give you some beautiful shadows and colors. Another option to consider is shooting during twilight. Twilight is when the sun sets but there's still daylight.
You might also be interested in long exposures. You can record images even after the shutter is closed for several minutes. The camera records only light falling on the sensor if it is kept closed. This light falls onto the sensor even after a long exposure. Because the shutter was closed, no new light enters your lens. This means that you will not see any movement. To ensure a clear image, you should turn off all automatic settings such autofocus or exposure. Before you begin shooting, adjust your ISO setting. An ISO setting of 200 will give you more control over the brightness or darkness of your image. When you're ready for the shot, press quickly the shutter button. This will bring the shutter completely to a close. Keep the shutter button pressed down until the last second. By holding down the shutter button, you prevent additional light from entering the camera. After you've taken the picture, wait a few seconds before releasing the shutter button. This will allow the camera to process your image. While the image is processing, you can see your photos on your computer monitor. Save them once you are satisfied with them.